

Choosing a micro water pump starts with the water path inside your equipment. Required flow, working pressure, voltage, tank position and working cycle all affect the final result. This guide uses five steps and actual pump data to help narrow suitable models before sample testing.
Micro Water Pump Selection at a Glance
A suitable micro water pump must provide the required flow at the actual working pressure. After that, check suction lift, voltage, liquid, working cycle and installation space.
- Define working flow and pressure together.
- Check whether the pump needs to draw water from below.
- Match voltage and current to the existing power system.
- Test the selected pump with the actual tubing and outlet.
What Is a Micro Water Pump?
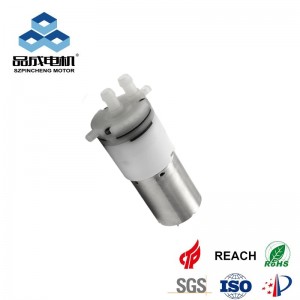
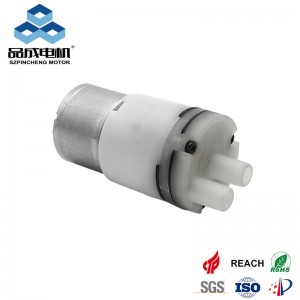
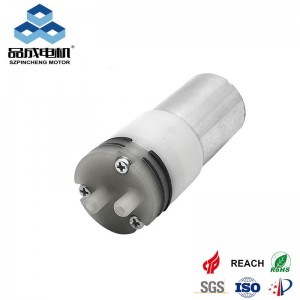
A micro water pump is a small electrically driven pump used to transfer water or compatible low-viscosity liquids inside equipment. Common applications include water dispensers, coffee machines, cleaning equipment, oral-care products and compact liquid-transfer systems.
For equipment using a small DC water circuit, selection usually comes down to six points: working flow, pressure, suction lift, voltage, liquid and duty cycle.
Maximum flow only shows one operating limit. It does not tell you how much water the pump will deliver after tubing, filters or nozzles are connected.
Customers who are still comparing the general product range can first review the micro water pump range before narrowing the pump by application.
How to Select a Micro Water Pump in 5 Steps
Step 1 — Define the Application and Liquid
Start with what the pump has to do.
A water dispenser may need fast transfer with relatively low outlet resistance. A portable coffee machine may require less flow but higher pressure because water has to pass through a narrow brewing path. A cleaning device may need both self-priming and a stable spray.
The liquid also matters. Normal water, beverage water and cleaning liquid should not automatically use the same pump material. Provide the actual liquid and temperature when asking for a recommendation.
For equipment that needs to draw liquid from a tank and build outlet pressure, micro diaphragm water pumps are commonly used because they can combine compact size, self-priming and pressure delivery.
Also define the real working cycle. For example, “30 seconds ON and 90 seconds OFF” is more useful than simply saying the pump works intermittently.
Step 2 — Calculate the Required Working Flow
Flow should be based on how much liquid the equipment must move within a given time.
For example, if the device needs to transfer 500 mL in 30 seconds:
500 mL ÷ 30 sec × 60 = 1,000 mL/min
The required flow is therefore approximately:
1.0 L/min
This does not mean you should choose a pump with exactly 1.0 L/min maximum flow.
Maximum flow is normally measured under very low outlet resistance. Once tubing, filters, valves or nozzles are added, the flow can decrease.
Maximum Flow vs. Working Flow
Maximum flow is the pump output under low-resistance conditions.
Working flow is the actual output when the pump is operating against the pressure created by the equipment.
For product design, working flow is the value that matters.
If your equipment needs 1.0 L/min, the next question should be:At what pressure must the pump still deliver 1.0 L/min?
Step 3 — Match Flow with Pressure, Head and Suction
Pressure and flow should not be selected separately.
If water needs to move upward, check the required pump head. If the tank is below the pump, check suction lift. If water passes through a small nozzle, filter or valve, the pump also needs to overcome back pressure.
A typical water path looks like this:
Tank → Pump → Tubing → Filter → Valve → Nozzle
Each part can change the actual flow.
A Real Self-Priming Example:Pinmotor's 370-XA is currently listed with a flow range of 0.3–0.8 L/min and suction lift up to 5 m. On the self-priming selection page, typical priming time for this model is around 20–40 seconds, depending on tubing and installation.
This is why suction lift should not be treated as only a specification number. A higher lift normally takes longer to establish water flow.
For example, Pinmotor's current self-priming reference data shows:
| Suction Lift | Typical Priming Time |
|---|---|
| 0.5–1 m | 3–10 s |
| 2 m | 10–20 s |
| 3 m | 15–25 s |
| 5 m | 20–40 s |
If the tank is installed below the pump, compare self-priming pump options according to the actual height and tubing layout rather than using maximum flow alone.
How to Read the P-Q Curve
Suppose the requirement is: 0.6 L/min at 50 PSI
You need a pump that can provide about 0.6 L/min while the system pressure is around 50 PSI.
Do not take a pump with:
Maximum Flow: 0.6 L/min
Maximum Pressure: 50 PSI
and assume it can provide both values at the same time.
The P-Q curve is used to check the actual flow available at a specific pressure.
Step 4 — Match Voltage, Current and Motor Type
Voltage should normally follow the power system already used in the equipment.
A 24V pump is not automatically better than a 12V pump. The correct choice depends on the existing power supply, required flow, pressure and current capacity.
The PYSP280-XA gives a useful example. Pinmotor currently lists the same 4.2 W pump with several voltage options:
| Rated Voltage | Rated Current |
|---|---|
| 3.7V | ≤1200 mA |
| 6V | ≤700 mA |
| 12V | ≤350 mA |
| 24V | ≤170 mA |
The rated power remains 4.2 W, while current changes significantly with voltage.
This shows why voltage should be selected from the equipment's electrical design first. The hardware engineer should confirm voltage, rated current, startup conditions and available power before the pump is approved.
Brushed or Brushless?
Brushed pumps are often suitable for cost-sensitive equipment with moderate or intermittent use. Brushless pumps remove carbon-brush wear and may be preferred when the equipment runs more frequently or requires electronic control.
| Factor | Brushed | Brushless |
|---|---|---|
| Initial cost | Lower | Higher |
| Carbon brush wear | Yes | No |
| Intermittent operation | Suitable | Suitable |
| Frequent operation | Check model | Often preferred |
| Speed control | Model dependent | More options |
Do not choose a brushless pump only from a claimed lifespan. Service life still depends on load, pressure, temperature and working cycle.
Projects that require brushless operation can compare available brushless water pump configurations after the hydraulic requirements are clear.
Step 5 — Test the Pump in the Actual Equipment
The final selection should be confirmed with the real water circuit.
Use the actual liquid, voltage, tubing length, tube diameter, tank position, filter, valve and nozzle. If the pump is installed above the tank, check how quickly it primes after the inlet tube contains air.
Noise should also be checked after installation. A pump that sounds acceptable on a test fixture may create more vibration after it is fixed to a plastic housing.
At the same time, confirm pump dimensions, port direction, tubing size, connector and wire length.
A useful final test condition is:
Actual Liquid + Actual Voltage + Actual Tubing + Actual Pressure + Actual Working Cycle + Final Housing
The pump should be approved from this test rather than from a free-flow test alone.
Micro Water Pump Selection Decision Table
| System Condition | Check First | Recommended Direction |
|---|---|---|
| Tank below pump | Suction lift | Self-priming diaphragm pump |
| Long tubing | Working flow and pressure | Check P-Q curve |
| Small nozzle | Back pressure | Higher-pressure pump |
| Filter or valve | System resistance | Test actual water path |
| Battery-powered device | Voltage and current | Low-power configuration |
| Frequent operation | Motor and duty cycle | Compare brushless |
| Noise-sensitive equipment | Noise and mounting | Test after installation |
| Limited installation space | Pump size and port direction | Compact configuration |
Compare Micro Water Pumps Across 5 Key Factors
| Factor | What to Check | Common Mistake |
|---|---|---|
| Flow | Flow required during operation | Looking only at maximum flow |
| Pressure | Pressure at the required flow | Looking only at maximum pressure |
| Suction | Tank position and inlet tubing | Ignoring inlet conditions |
| Voltage | Voltage, current and available power | Selecting by voltage only |
| Integration | Liquid, duty cycle, size and noise | Testing the pump alone |
For most projects, the selection order can be kept simple:
Flow → Pressure → Suction → Voltage → Final Test
Pinmotor Micro Water Pump Model Recommendation Matrix
The table below can be used to narrow the initial model range. Final selection should use the exact model datasheet and P-Q curve.
| Requirement | Model | Voltage | Power | Reference Flow | Pressure / Head |
|---|---|---|---|---|---|
| Compact low-flow system | 030 | 5–6V | 3.2 W | 0.1–0.4 L/min | ≥30 PSI / ≥2 m head |
| Higher-flow transfer | 280-XA | 3.7–24V | 4.2 W | 1.5–2.0 L/min | ≥1 m head |
| Higher-pressure water path | 370 Series | 3–24V | 3.6 W | 0.3–0.8 L/min* | 30–130 PSI* / ≥5 m |
| Higher-flow self-priming transfer | 385-XA | 3.7–24V | 2.2 W | 1.2–3.0 L/min | 15 PSI / ≥2 m head |
| Brushless OEM system | 310A-XA | 3–12V | 4.2 W | 0.5–1.5 L/min | 20–60 PSI / ≥4 m head |
370 performance varies by pump-head configuration. Other 370 versions are available with different flow and pressure ranges.
For higher flow with relatively low resistance, start by comparing 280-XA and 385-XA. If the water path contains a restrictive nozzle or requires higher pressure, the 370 series is a better starting point. For a brushless motor requirement, 310A-XA can be evaluated after the target flow and pressure are confirmed.
Common Micro Water Pump Selection Mistakes
1、Selecting by Maximum Flow Only
A pump rated at 1.5 L/min may deliver less after it is connected to the actual tubing and outlet restriction. Check flow at the expected working pressure.
2、Combining Maximum Flow and Maximum Pressure
Maximum flow and maximum pressure normally occur at different points on the performance curve. They should not be treated as one operating condition.
3、Ignoring the Tank Position
When the pump is above the liquid level, suction lift and priming time affect startup. Long or narrow inlet tubing can make this worse.
4、Selecting by Voltage Only
The pump may have the correct voltage but still draw more current than the power supply can support. Voltage and current should be checked together.
5、Skipping the Final Equipment Test
Tubing, valves, nozzles and the housing can change flow, priming, current, vibration and noise. Test the complete water circuit before production.
Frequently Asked Questions
1、How Do I Choose the Right Micro Water Pump?
Start with the required working flow and pressure. Then check tank position, suction lift, voltage, liquid, working cycle and installation space. Use the P-Q curve to narrow the models and test the final candidate in the actual equipment.
2、What Flow Rate Do I Need?
Calculate the liquid volume that must be delivered within a certain time. For example, 600 mL in one minute requires about 0.6 L/min. Then check whether the pump can maintain that flow at the actual system pressure.
3、What Is the Difference Between Maximum Flow and Working Flow?
Maximum flow is measured under low outlet resistance. Working flow is the flow available after the pump is connected to the real tubing, valves, filters and nozzles.
4、Do I Need a Self-Priming Water Pump?
A self-priming pump is useful when the pump is above the liquid level or when the inlet tube may contain air before startup. If the pump inlet is always supplied with liquid, suction lift is less important.
5、Is a 12V or 24V Micro Water Pump Better?
Neither is automatically better. Choose the voltage that matches the equipment power system, then check whether the pump can provide the required flow and pressure at that voltage.
6、What Information Should I Send for Pump Selection?
Provide the application, liquid, required flow, pressure or head, voltage, tank position, tubing size, working cycle and installation space.
Need Help Selecting a Micro Water Pump?
Send your required flow, pressure or head, voltage, liquid, tank position, tubing and working cycle. Pinmotor can narrow the available models and provide samples for testing in your equipment.
Read More News
Post time: Aug-19-2026