

The world of miniature engineering is fascinating, and few projects are as rewarding as building your own functional device. If you've ever wondered about the mechanics behind small fluid systems, learning how to make mini dc water pump at home is the perfect starting point. This guide will walk you through the steps to construct a simple, working water pump using common materials and a small DC motor. While this DIY project is a great educational tool, it also serves to highlight the precision and engineering required for professional-grade components like themicro 12 volt dc water pump or the versatile micro water pump dc. We will explore the basic principles that govern these devices, from the simple micro 3v water pump used in small fountains to the complex micro diaphragm high pressure water pump found in medical devices. Understanding this process will give you a new appreciation for the micro dc pump water technology that powers everything from laboratory equipment to home appliances.
Chapter 1: The Science Behind the Mini Pump
A water pump, at its core, is a device that converts rotational energy from a motor into kinetic energy in the fluid, moving it from one point to another. The simplest DIY version mimics the function of a centrifugal pump.
The Key Components:
1、 The Motor: A small DC motor (3V to 12V) is the heart of the pump. This is what provides the rotational power.
2、The Impeller: This is the rotating component that spins the water. Its blades push the water outwards, creating a low-pressure zone at the center (inlet) and a high-pressure zone at the edge (outlet).
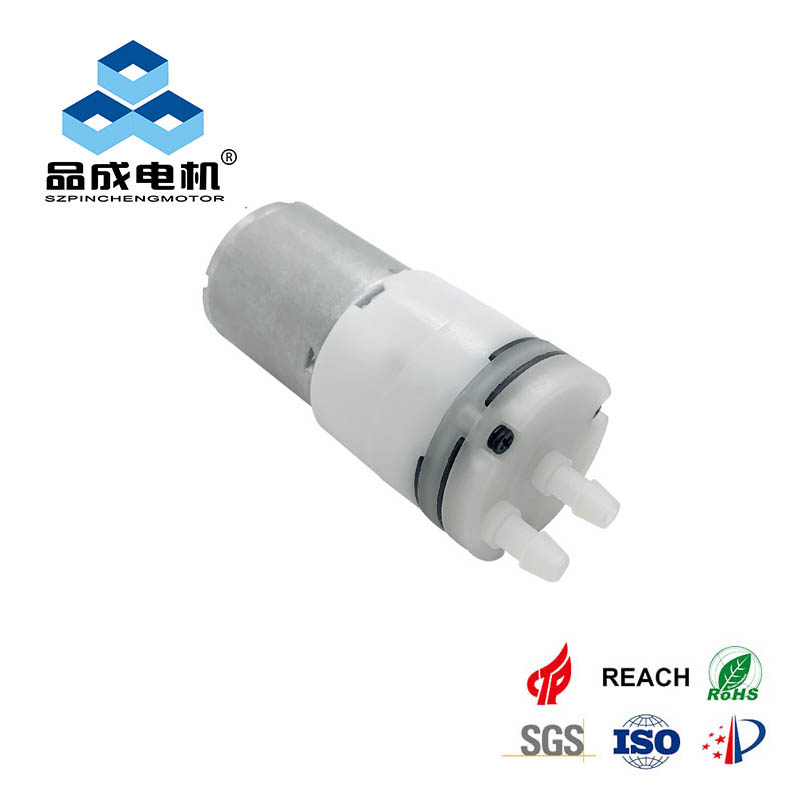
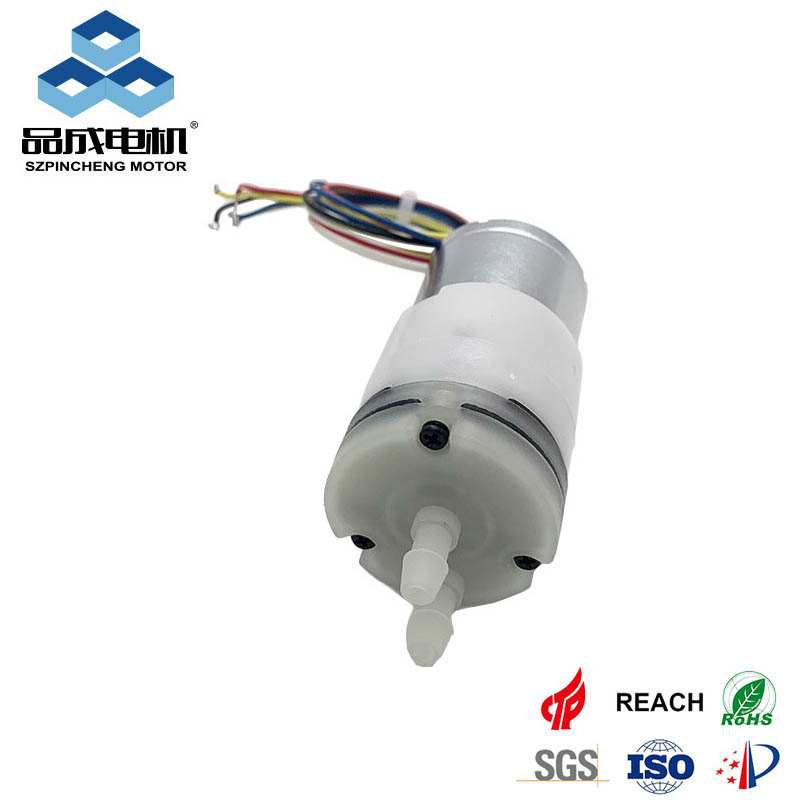
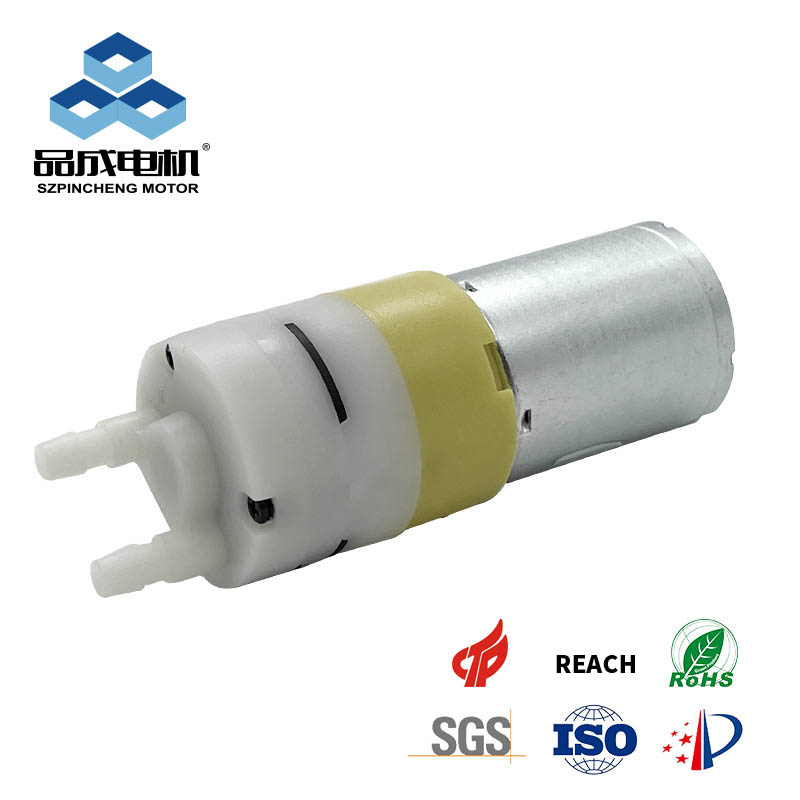
3、 The Casing (Volute): This housing surrounds the impeller. Its shape is designed to capture the high-velocity water and convert its kinetic energy into pressure energy, which is essential for achieving good micro water pump pressure.
For more advanced applications, professional pumps utilize more complex mechanisms. For instance, a micro piston water pump uses a reciprocating motion to achieve extremely high pressures and precise dosing, while a system requiring a micro water pump valve is designed for controlled, intermittent flow.
Chapter 2: Materials and Tools for Your DIY Pump
To build a basic centrifugal mini pump, you will need the following materials and tools:
- Small DC Motor (3V or 5V): This will serve as the power source for the pump.
- Plastic Bottle Cap: This will be used to create the impeller.
- Thin Plastic Sheet (e.g., from a CD case): This material is needed to cut the impeller blades.
- Small Plastic Container or Box: This will serve as the pump casing.
- Hot Glue Gun: Essential for assembly and creating watertight seals.
- Straws or Small Tubing: These will be used for the inlet and outlet ports.
- Power Source (e.g., AA batteries or a DC adapter): Needed to run the motor.
Chapter 3: Step-by-Step Construction Guide
Follow these steps to assemble your mini water pump:
Step 1: Prepare the Impeller
Cut the plastic bottle cap to fit inside your casing. From the thin plastic sheet, cut 4 to 6 small, curved blades. These blades should be glued vertically inside the bottle cap, ensuring they are evenly spaced and angled slightly to scoop the water. This component is crucial for the pump's efficiency.
Step 2: Attach the Motor
Carefully drill a small hole in the center of the bottle cap (impeller) that is just large enough to fit snugly onto the shaft of your DC motor. Use a small amount of hot glue to secure the impeller to the motor shaft. Ensure the impeller is centered and balanced to prevent excessive vibration.
Step 3: Construct the Casing
Take your plastic container and make three holes:
1、A small hole in the center of the base for the motor shaft to pass through.
2、A hole on the side near the center for the inlet tube.
3、A hole on the side near the edge for the outlet tube.
The casing must be sealed to prevent leaks. Insert the motor into the base hole, ensuring the impeller is inside the casing. Use hot glue to seal the motor to the casing, making it watertight.
Step 4: Install Inlet and Outlet
Insert the straws or small tubing into the inlet and outlet holes. Use hot glue to create a strong, watertight seal around both tubes. The inlet should be positioned close to the center of the impeller, and the outlet should be positioned at the edge of the casing where the water is thrown out by centrifugal force.
Step 5: Testing and Refinement
Connect your power source to the motor terminals. For a micro water pump dc 24v motor, you would need a 24V supply, but for this small DIY project, a 3V or 5V supply is sufficient. Place the inlet tube into a container of water and the outlet tube into an empty container. Turn on the power. If the pump runs but doesn't move water, check for air leaks or ensure the impeller is spinning in the correct direction.
Chapter 4: From DIY to Professional Grade
While your homemade pump is a fun and educational success, it quickly reveals the limitations of DIY construction when compared to a professionally engineered product. Achieving reliable performance, high efficiency, and specific fluid dynamics requires specialized manufacturing.
For instance, if your application requires moving delicate fluids, such as in laboratory analysis, you would need a specialized micro water pump for water samples. If you need to move fluid with minimal disturbance, a low flow micro water pump is essential, a feature difficult to replicate with a simple homemade impeller. Furthermore, the longevity and consistency of a high quality micro water pump are unmatched.
Pincheng Motor specializes in bridging this gap between concept and reliable performance. Our products, from the robust micro 12 volt dc water pump to the precise micro 3v water pump, are engineered for specific industrial and commercial applications. We offer a range of solutions, including the powerful micro diaphragm high pressure water pump and components like the micro water pump valve, ensuring that whatever your fluid handling needs are, we have a reliable, high-performance solution. By choosing a professional micro water pump dc solution, you are investing in guaranteed performance, durability, and the peace of mind that comes with a perfectly engineered product.
you like also all
Read More News
Post time: Nov-08-2025