

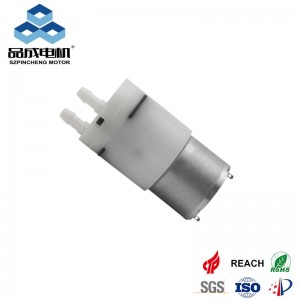
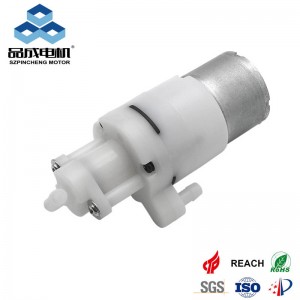
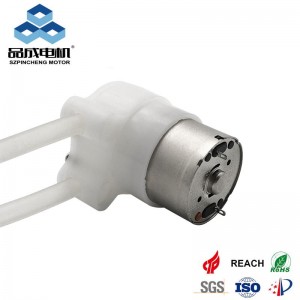
Micro water pumps supplier
Mini diaphragm water pumps are incredibly useful little workhorses, powering everything from aquariums and hydroponics systems to DIY projects and small fountains. But when your trusty pump suddenly stops humming and moving water, frustration sets in fast. Don't panic! Most failures are due to common, often fixable issues. Let's dive into the most frequent reasons why your mini diaphragm pump might not be working and how to troubleshoot them.
1. Power Supply Problems: The Obvious First Check
-
Is it plugged in/connected? Seriously, double-check all connections. A loose power plug or DC connector is the easiest fix.
-
Is the power source working? Test the outlet with another device. For DC pumps, verify your power adapter/battery is outputting the correct voltage and sufficient current (Amps). A weak or dead battery or an underpowered adapter is a common culprit. Use a multimeter if possible.
-
Check the Wiring: Inspect the power cord and pump wires for any cuts, kinks, or breaks, especially near connectors or where the cord enters the pump housing.
-
Correct Polarity (DC Pumps): Ensure positive (+) and negative (-) wires from your power source are connected to the correct terminals on the pump. Reversing them often prevents operation.
2. Airlock or Priming Issues
-
Diaphragm pumps NEED liquid to prime: Unlike some centrifugal pumps, diaphragm pumps rely on the liquid itself to create a seal and facilitate pumping. If the pump or inlet line is completely dry ("airlocked"), it may not be able to start.
-
Solution: Try priming the pump. Submerge the inlet completely in water or pour water directly into the inlet port while briefly powering the pump. You should hear the sound change as water fills the chamber and pumping begins.
-
3. Inlet Blockage or Restriction
-
The Most Common Culprit: Debris, mineral buildup (scale), algae, or a kinked/clamped inlet tube can starve the pump of water. Even a small blockage can drastically reduce or stop flow.
-
Solution:
-
Disconnect the inlet tube and inspect it for kinks or clogs.
-
Check the inlet filter/strainer (if equipped) and clean it thoroughly.
-
Inspect the pump's inlet port itself for debris. Use a small brush or toothpick carefully.
-
Ensure the water source (reservoir, bucket) isn't empty or the inlet isn't sucking air due to a low water level.
-
-
4. Outlet Blockage or Excessive Pressure (Head Height)
-
Clogged Outlet: Debris or kinks in the outlet tube can create backpressure, preventing water from exiting or even stalling the pump motor.
-
Solution: Disconnect the outlet tube and check for blockages. Ensure the tube is kink-free.
-
-
Exceeding Maximum Head Height: Every pump has a maximum vertical lift (head height) it can achieve. If you're trying to pump water higher than the pump's rated maximum head, flow will stop completely or reduce to a trickle.
-
Solution: Check the pump's specifications. Lower the outlet height relative to the pump or choose a pump with a higher head rating for your application.
-
5. Faulty or Dirty Check Valves
-
Critical Components: Diaphragm pumps have inlet and outlet check valves (tiny flaps or balls) that only allow water to flow in one direction. If these valves get stuck open (due to debris or wear) or stuck closed, the pump won't move water properly.
-
Symptoms: Pump runs but no flow, very low flow, or water flows backwards when the pump stops.
-
Solution: Disassemble the pump housing (consult manual if possible) to access the valve chambers. Clean any debris carefully. Inspect the valve flaps/balls and seats for damage or excessive wear. Replacement valves are sometimes available.
-
6. Worn, Torn, or Hardened Diaphragm
-
The Heart of the Pump: The flexible diaphragm creates the pumping action. Over time, it can:
-
Become Brittle/Hardened: Due to age, heat, or exposure to incompatible chemicals/solvents.
-
Tear or Develop Pinholes: Especially if run dry frequently or subjected to abrasive particles.
-
Lose Elasticity: Leading to reduced flow and pressure.
-
Solution: Requires pump disassembly. Inspect the diaphragm carefully. If cracked, stiff, or torn, it must be replaced. Use only compatible replacement diaphragms.
-
7. Motor or Electrical Failure
-
Burnt Out Motor: Overheating due to running dry, prolonged overload (blockage/high head), voltage spikes, or simply old age can cause the motor windings to fail.
-
Symptoms: Pump doesn't run at all, or runs very hot and hums/buzzes without pumping. Sometimes a faint "burnt" smell.
-
-
Failed Internal Components: Capacitors, armatures, or brushes (in some models) can fail.
-
Solution: If basic checks pass (power supply good, no blockage, pump spins freely by hand when disconnected), motor failure is likely. Repair is often impractical for mini-pumps; replacement is usually the most economical option.
8. Mechanical Binding or Worn Parts
-
Grit or Debris in Mechanism: Sand or grit entering the pump mechanism can jam the connecting rod or bearings.
-
Worn Bearings or Bushings: Cause excessive friction, noise, overheating, and eventual seizure.
-
Solution: Disassembly, thorough cleaning, and inspection. Replacement parts may be hard to find for cheap mini-pumps.
Troubleshooting Steps Summary:
-
Check Power: Connections, source (voltage/amps), wiring.
-
Prime the Pump: Ensure inlet and pump are full of water.
-
Inspect Inlet: Tube for kinks, filter for clogs, inlet port for debris. Ensure water source is accessible.
-
Inspect Outlet: Tube for kinks/clogs. Verify head height is within pump specs.
-
Listen & Feel: Does the motor run? Does it get hot? Is there vibration but no flow (suggests valves/diaphragm)?
-
Check Valves: Requires disassembly. Clean and inspect.
-
Inspect Diaphragm: Requires disassembly. Look for tears, stiffness, holes.
-
Consider Motor Failure: If all else checks out and it still won't run or pump.
Prevention is Key:
-
Never Run Dry: This is the #1 killer. Always ensure the pump is primed and the inlet is submerged.
-
Use a Pre-Filter: Protect the inlet from debris, especially in dirty water sources.
-
Avoid Incompatible Liquids: Check the pump specs. Don't pump oils, fuels, or corrosive chemicals unless the pump is specifically rated for them.
-
Don't Exceed Ratings: Stay within voltage, head height, and flow rate limits.
-
Keep Cool: Ensure adequate ventilation around the pump motor.
When to Replace:
Mini diaphragm pumps are often relatively inexpensive. If troubleshooting points to a failed motor, badly worn internal parts, or a damaged housing, and replacement parts are unavailable or cost more than half the price of a new pump, replacement is usually the most sensible option.
By methodically working through these common causes, you stand an excellent chance of diagnosing and potentially fixing your mini diaphragm water pump, getting your project or system back up and running smoothly.
you like also all
Post time: Aug-13-2025