

How to Build an Automatic Dosing System with a Mini Peristaltic Pump
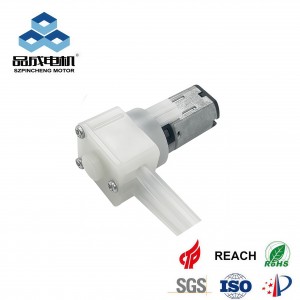
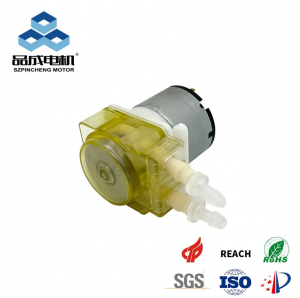
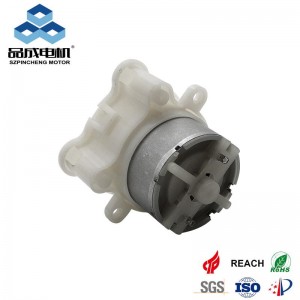
An automatic dosing system is a game-changer for anyone who needs to add precise amounts of liquid consistently—from aquarium enthusiasts to home gardeners and hobbyists. At the heart of such a system lies the Mini peristaltic pump, a device celebrated for its exceptional accuracy and control.
This guide will walk you through the steps of building your own automated dosing system, leveraging the precision of a 12v peristaltic pump for a variety of applications.
Why a Mini Peristaltic Pump is Ideal for Dosing
Before we build, it's crucial to understand why the Mini peristaltic pump is the superior choice for this project:
1、High Precision: It delivers highly repeatable volumes of liquid, ensuring the same dose every time.
2、Excellent Control: The flow rate is directly proportional to the motor's speed, allowing for easy control via a simple timer or microcontroller.
3、Contamination-Free: The fluid only contacts the internal tubing, preventing cross-contamination and making it safe for nutrients, additives, or other sensitive liquids.
4、Self-Priming & Dry-Run Capable: These pumps are easy to set up and can run dry without immediate damage, adding to their reliability.
Whether you're creating a peristaltic pump for aquarium additives or a water peristaltic pump for garden fertilizers, this technology is perfectly suited for the task.
Components You Will Need
To build your automatic dosing system, you will need the following components:
1、The Pump: A Mini peristaltic pump head paired with a DC motor. A 12v peristaltic pump is a common and easy-to-power choice.
2、Control Unit: The brain of the system. This can be as simple as a:
Programmable Timer Relay: A cost-effective option for basic on/off scheduling.
Microcontroller (e.g., Arduino or Raspberry Pi): For advanced control, allowing for complex schedules, variable flow rates, and sensor integration.
3、Power Supply: A 12V DC power adapter rated for your pump's current draw.
4、Tubing: Chemical-resistant tubing like Norprene or Tygon for the pump head, and standard vinyl tubing for the feed and output lines.
5、Liquid Reservoir: A bottle or container to hold the liquid you are dosing.
6、Miscellaneous: Jumper wires, a breadboard or perfboard for prototyping, and possibly a motor driver (like an L298N) if using a microcontroller.
Step-by-Step Assembly Guide
Step 1: Set Up the Pump and Tubing
Attach the tubing to your Mini peristaltic pump. Place one end into your liquid reservoir and the other end where you want the dose to be delivered. Ensure the tubing path is smooth and without sharp kinks.
Step 2: Connect the Power and Control System
The wiring will depend on your chosen control unit.
Using a Simple Timer Relay:
1、Connect the 12v peristaltic pump directly to the timer relay's output terminals.
2、Connect the 12V power supply to the timer's input terminals.
3、Program the timer with your desired dosing schedule (e.g., activate for 30 seconds every 6 hours).
Using an Arduino (for Advanced Control):
1、Connect the pump motor to a motor driver module.
2、Connect the motor driver to the Arduino and your 12V power supply.
3、This setup allows you to write a script that controls not just the duration but also the speed of the pump.
Step 3: Calibrate Your Dosing System
This is the most critical step for accuracy. You need to determine your pump's flow rate.
1、Method: Run your pump for a known period (e.g., 1 minute) at the voltage and speed you plan to use.
2、Measure: Collect the output liquid in a graduated cylinder and measure the volume.
3、Calculate: Flow Rate (mL/min) = Volume (mL) / Time (min).
Now, you can calculate the run time needed for any desired dose. For example, if your flow rate is 10 mL/min and you need a 5 mL dose, you would run the pump for 30 seconds.
Step 4: Finalize and Enclose
Once tested and calibrated, solder your connections for durability and place all components into a suitable project box to protect them from dust and moisture. This is especially important for a peristaltic pump for aquarium setup, where humidity is high.
Practical Applications: From Aquariums to Gardens
-
Aquarium Dosing: The perfect peristaltic pump for aquarium use. Automatically dose alkalinity buffers, calcium, magnesium, and trace elements to maintain a stable reef environment.
-
Hydroponics & Gardening: Use your water peristaltic pump to automatically add liquid nutrients or pH adjusters to your hydroponic system or irrigation line, ensuring your plants get perfect nutrition 24/7.
-
Home Brewing & Fermentation: Precisely add yeast nutrients or other additives during the fermentation process according to a programmed schedule.
-
DIY Chemistry or Lab Work: Automate the addition of reagents in small-scale experiments.
you like also all
Read More News
Post time: Sep-30-2025